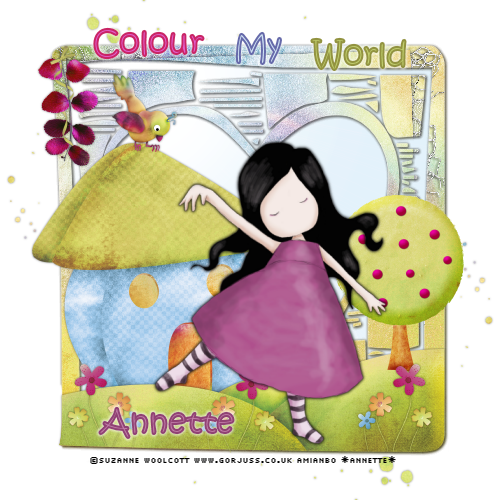
Colour My World
Materials needed :- I used PSP 9
Tube of choice. I used Colour pk5 Artwork ©Suzanne Woolcott here
Scrapkit of choice. I used Mon Petit Jardin, a lovely freebie kit which you can find here
Fabulous heart frame by Lorna here
Font of choice.
Open a new image 500 x 500 transparent.
Open Lorna's frame, copy & paste as new image, resize by 85% selections ~ select all ~ float ~ defloat. Open paper of choice ~ Copy & paste into selection ( I used paper 6) Selections ~ none.
Take selection tool, rectangle and draw a square on top of the frame (to fill behind frame)
New raster layer ~ flood fill with #e1f0f9 or colour of choice. Selections ~ none ~ move layer below frame.
Go to effects ~ illumination effects ~ sunburst default settings.
Open element 1 ~ copy & Paste as new layer ~ resize by 11% move to bottom of frame so that no frame is showing beneath bottom edge.
Highlight frame layer in palette. Selections ~ select all~ selections float ~ defloat ~invert.
Highlight element 1 layer in palette ~ with eraser tool erase around the bottom and lower sides to match with the frame edges. Selections ~ none ~ effects ~ drop shadow v0 h0 o50 b3 black.
Open element 2 ~ copy & paste as new layer ~ resize by 13% ~ position to the left and down a little using my tag as a guide. Drop down one layer in palette ~ Drop shadow as before.
Open element 10 ~ copy & paste as new layer ~ Resize by 9% ~ Position to the right and down a little using my tag as a guide drop shadow ~ make sure this layer is the top layer in palette.
Open element 5 ~ copy & paste as new layer ~ resize by 5% ~ bring to bottom right ~ drop shadow
duplicate ~ image ~ Mirror ~ duplicate and move to middle as per my tag.
Merge these three layers and with eraser tool erase any stems hanging over bottom edge ~ use zoom tool for a clearer view.
Open element 27 ~ copy & paste as new layer ~ resize by 6% ~ position on top of roof ~ drop shadow.
Open element 24 ~ copy & paste as new layer ~ resize by 6% ~ position to top left of frame ~ drop shadow.
Open element 20 ~ copy and paste as new layer ~ resize by 10% ~ move down to bottom right ~ duplicate ~ image mirror, image flip ~ merge the two layers and bring to bottom of palette ~ drop shadow.
Open tube of choice ~ resize if needed and position on tag ~ drop shadow.
Write text of choice using font of choice I used Kristen ITC size 30 stroke 2 using different colours from the tag for each word.
Write your name using the same font and two colours from your tube. Drop shadow wording and name using eye candy 4000, gradient glow ~ basic ~ 3,25,100 ~ colour ~ thin, white.
add copyright and save as a png
And that's it! :)